|
|
||
Source: abduzeedo.com
Create a new document. I’m using 2560x1440 pixels for the document size. After that I filled tha background layer with a dark grey. This part will be necessary to create the water drops.
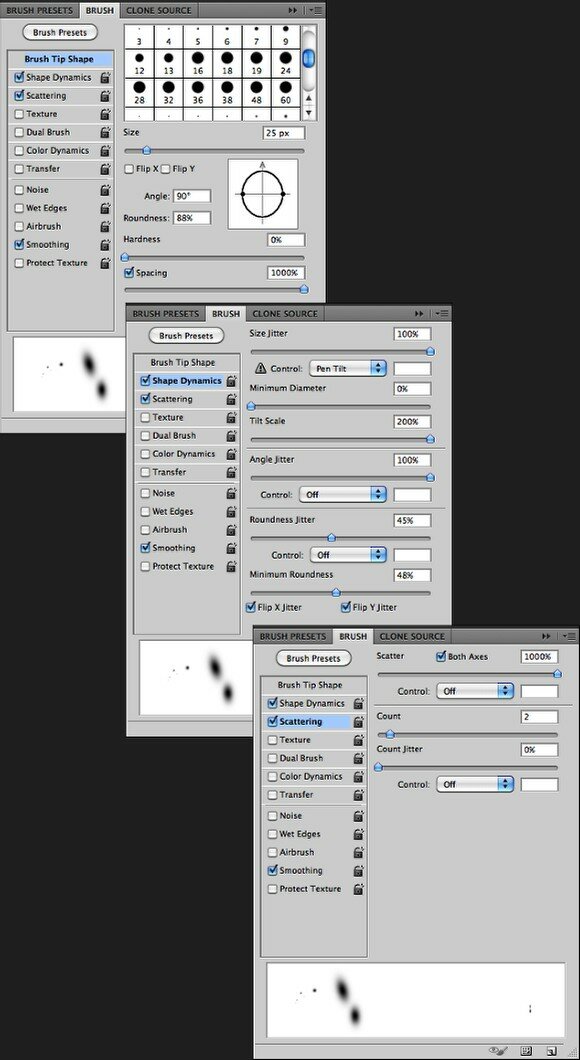
Go to Window>Brushes to create the brush for the water drops. Follow the image below for the settings but it’s important to change the shape to an ellipse and also for this first part the brush has to be very soft.
Add a new layer and group this layer into a folder. Then change the Blend Mode of the folder to Color Dodge. With the Brush Tool (B) and white for the color, paint with the Brush Tool some drops. As you can see the blurry edges of the little objects sort of melt with one another depending how close they are. That is really important to make the drops more realistic.
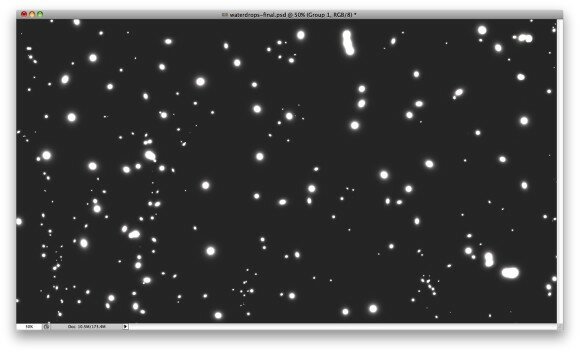
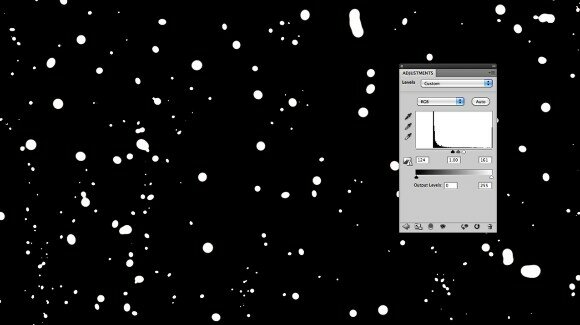
Select the background layer and the group with the drops and merge them into on layer. After that go to Image>Adjustments>Levels. Change the Black Input to 124 and the White to 161. The values might vary depending on the drops, so just make sure that you get rid of the blurry edges.
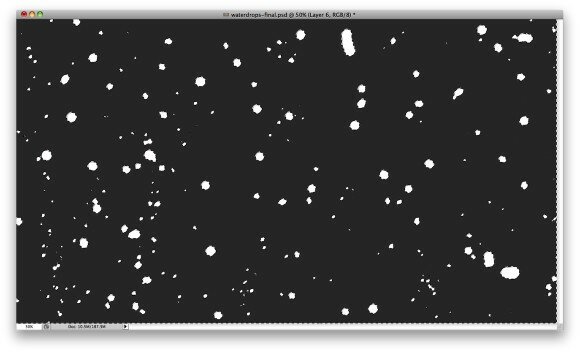
With the Magic Wand Tool (W) select the black area, then go to Select>Similar to make sure all the black areas get selected. Then delete this area.
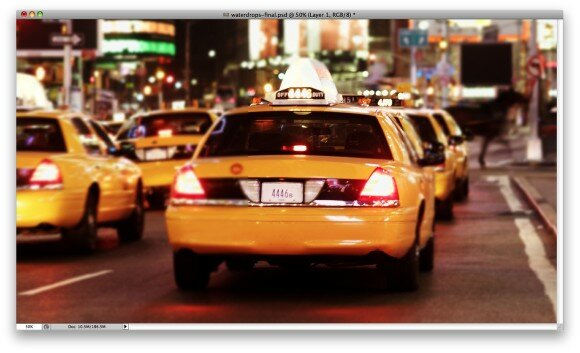
Import an image to use in our design. The one I’m using is courtesy from Thinkstock and you can find it here. Duplicate this layer because we will use it a few more times with different blur values.
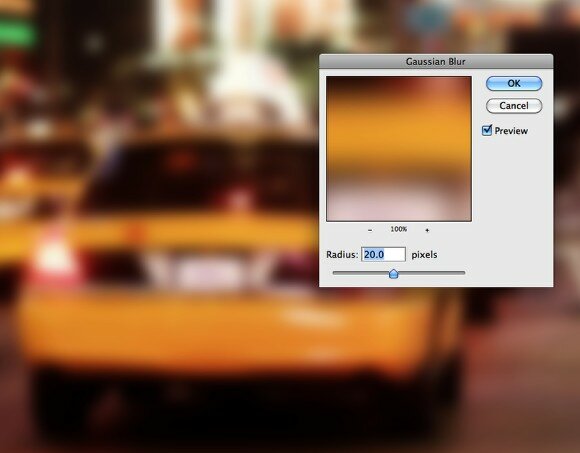
Now: Filter>Blur>Gaussian Blur. Use 20 pixels for the Radius.
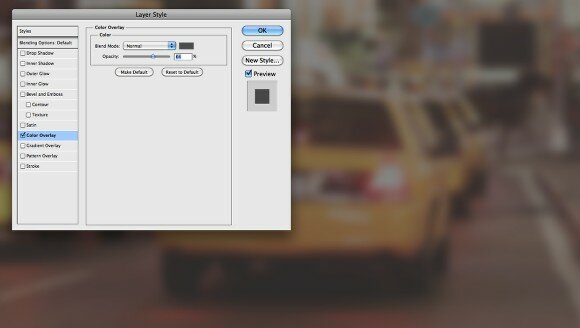
Next: Layer>Layer Styles>Color Overlay. Use a dark grey for the color and change the Opacity to 60%.
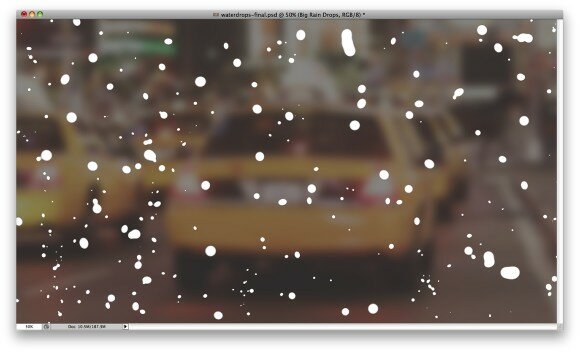
Now put the water drops in front of the image and let’s apply some layer styles to give them the realistic effect we want.
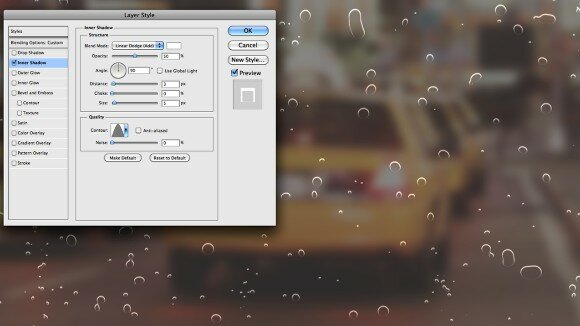
Go to Layer>Layer Styles>Blending Options and change the Fill Opacity to 0. After that select Inner Shadow. Use white for the color and LInear Dodge for the Blend Mode, for the Opacity use 50%, for the angle 90º, then for the Distance use 3 pixels and for the Size use 5 pixels. Also change the Contour mode to the Cone one.
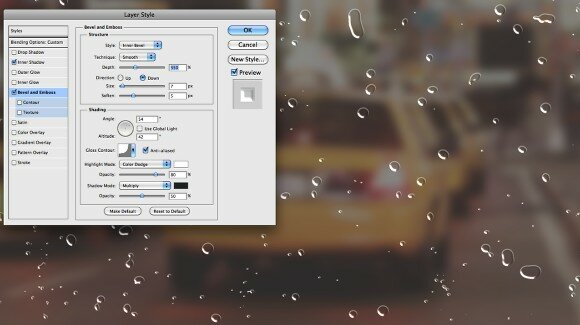
Select Bevel and Emboss. Change the Depth to 350%, the Direction to Down, the Size to 7 pixels, the Soften to 5 pixels, then over the Shading options use 54º for the Angle and 42º for the Altitude. Also change the Gloss Contour to the Cove Deep one, the for the Highlight Mode use 80% with white and Color Dodge for the Blend Mode, then for the Shadow Mode use Multiply with black and 50% of Opacity.
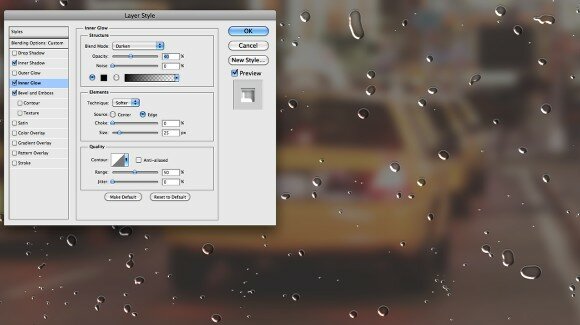
Select Inner Glow then for the Blend Mode use Darken with 40% Oapcity and black for the color. Change the Source to Edge and the Size to 25 pixels.
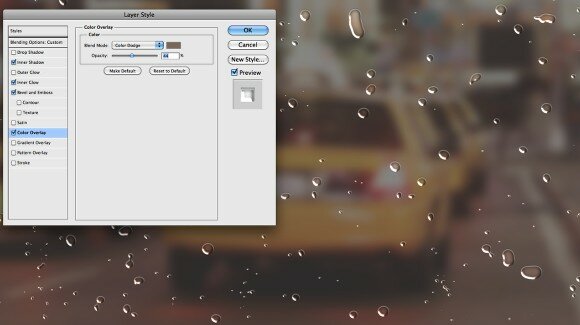
Now select Color Overlay and use (#907f72) for the color with Color Dodge with 45% Opacity.
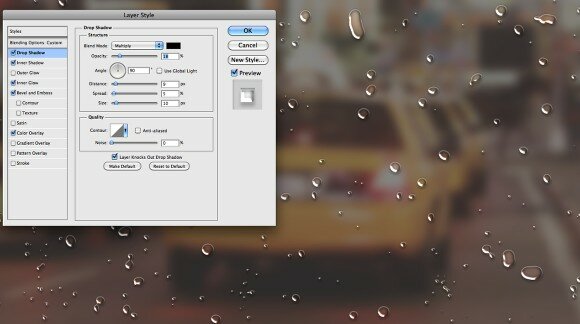
The last layer style option will be Drop Shadow. Use Multiply for the Blend Mode, black for the Color and 20% Opacity. Change the Angle to 90º and use 9 pixels for the Distance, 5% for the Spread and 10 pixels for the Size.
Make the photo without blur visible again and go to Filter>Blur>Gaussian Blur. Use 5 pixels this time. Then over the Layer Palette click with the right button of the mouse on the thumb of the water drops layer, then select "Select Pixel" to select just the water drops.
Select the photo that we applied the 5 pixles Gaussian Blur and go to Layer>Layer Mask>Reveal Selection. This way the image with 5 pixels blur will be only visible beneath the water drops
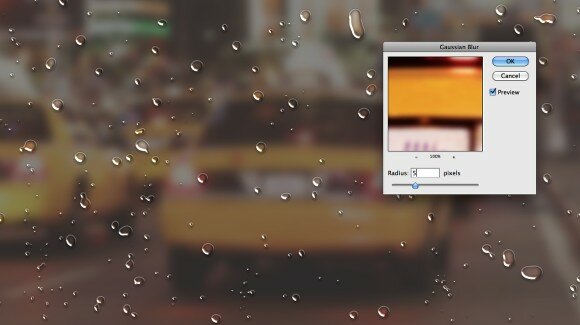
Select the layer mask that we created in the previous step and go to Filter>Blur>Motion Blur. Use -90º for the Angle and 80 pixels for the Distance.
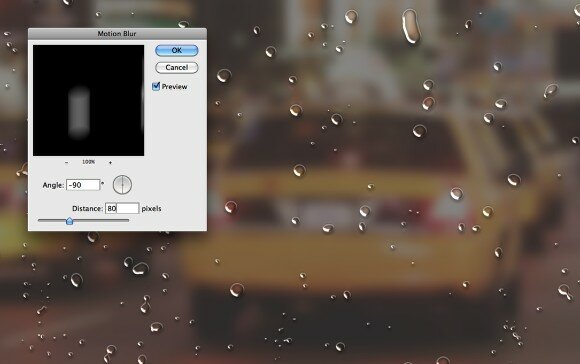
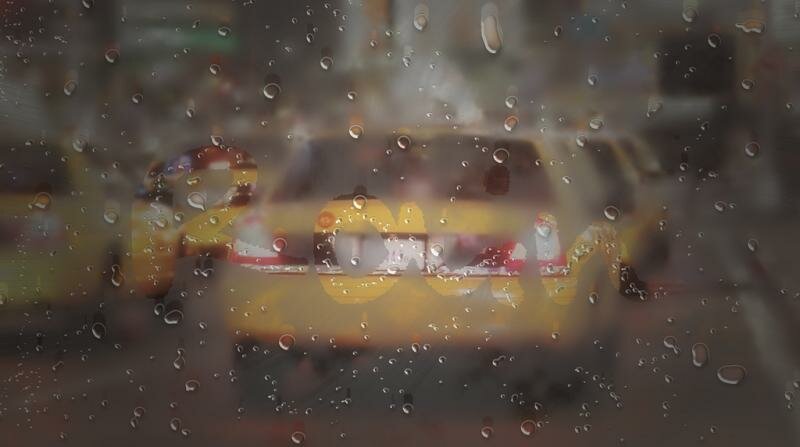
After the motion blur, go to Image>Adjustments>Levels. Change the black and white inputs again to get rid of the blurry edges caused by the blur. You will have an effect like the image below as if the water drops were running down on the window.
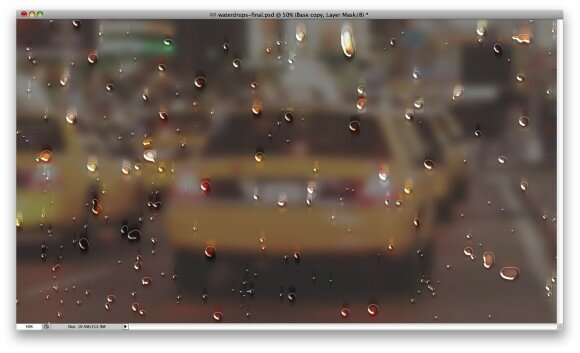
Duplicate the layer with the photo that we applied the Gaussian Blur with 5 pixels for the radius only and delete the layer mask. The with the Horizontal Type Tool (T) add a text with a handwriting font, or if you have a tablet or is really good with the mouse you can write with your own handwriting. Again select just the pixels of the text like we did in the Step 15. Then mask this new photo with the shape of the text, so again the photo will be visible only beneath the text area.
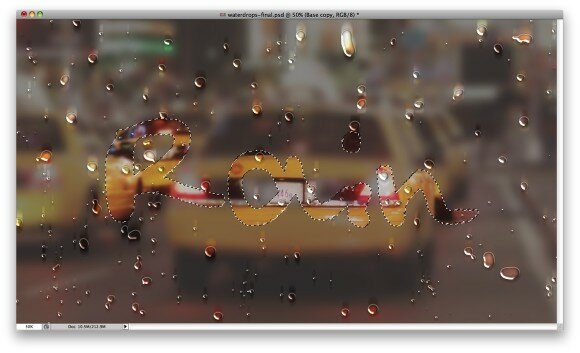
Add a new layer and with the Brush Tool (B) and the same brush we created the water drops, add more water drops and especially over the text area like the image below. To apply the same layer style of the water drops, just click with the right button of the mouse over the water drops layer and select Copy Layer Style, then on the new layer with the small water drops click again with the right click of the mouse and select Paste Layer Style.
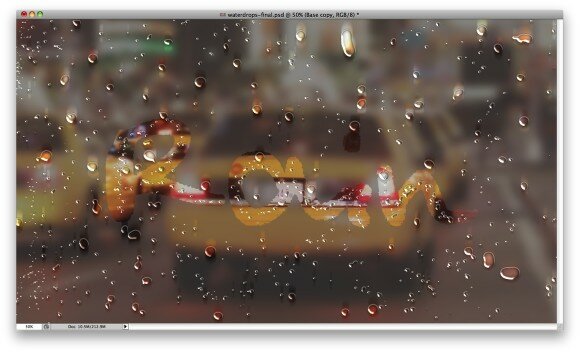
Duplicate the photo again and delete the layer mask, after that go to Layer>Layer Mask>Hide All. Select the thumb of the layer mask and go to Filter>Render>Clouds. Make sure you had black and white for the colors. This will apply a cloud texture to the foggy window effect, that will make it more realistic.
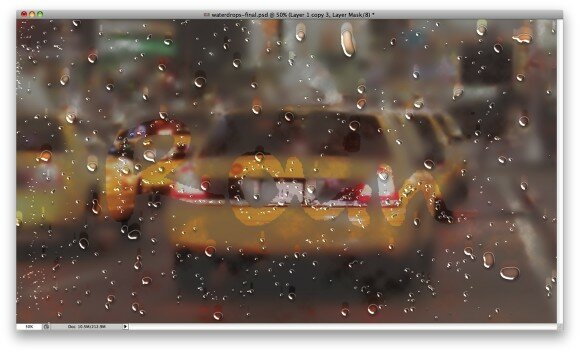
Select all layers and duplicate them, after that merge all the duplicated layers into one. You can also use the keyboard shortcut Command+Alt+Shift+E. Then go to Filter>Blur>Gaussian Blur. Use 20 pixels for the Radius.
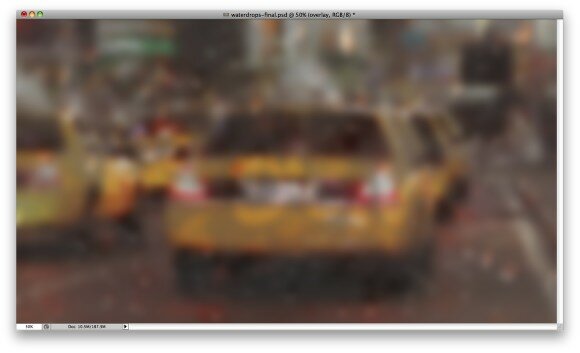
Change the Blend Mode of this blurry layer to Overlay with 40% opacity.
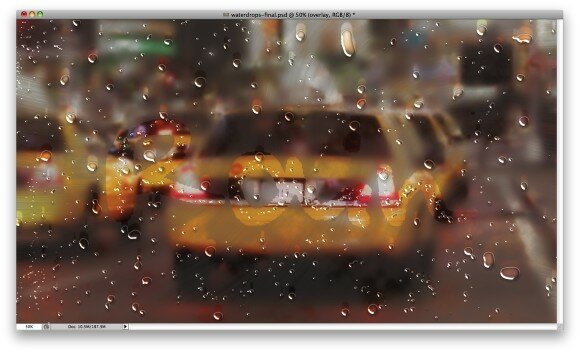
Duplicate the previous layer and just change the Blend Mode to Screen, keep the same 40% of Opacity.
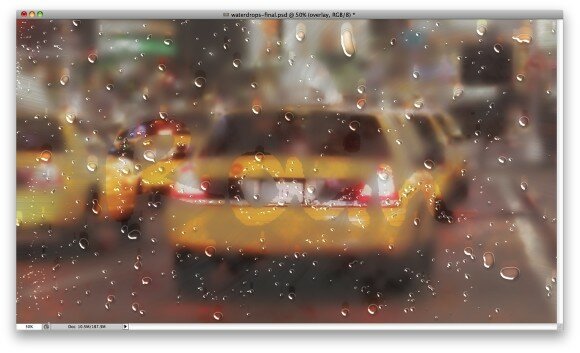
Add a new layer on top of the others and fill it with a radial gradient using dark grey and light grey for the colors. Also use Multiply for the Blend Mode.
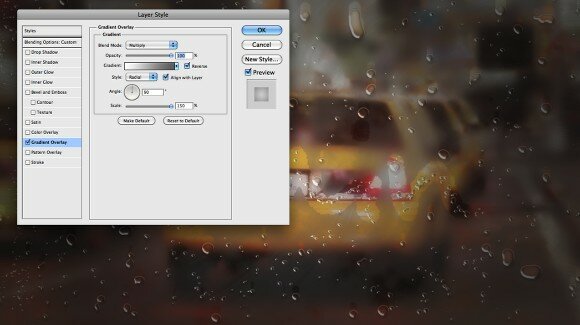
And now:

Go to Window>Brushes to create the brush for the water drops. Follow the image below for the settings but it’s important to change the shape to an ellipse and also for this first part the brush has to be very soft.

Anuncios Google
Add a new layer and group this layer into a folder. Then change the Blend Mode of the folder to Color Dodge. With the Brush Tool (B) and white for the color, paint with the Brush Tool some drops. As you can see the blurry edges of the little objects sort of melt with one another depending how close they are. That is really important to make the drops more realistic.

Select the background layer and the group with the drops and merge them into on layer. After that go to Image>Adjustments>Levels. Change the Black Input to 124 and the White to 161. The values might vary depending on the drops, so just make sure that you get rid of the blurry edges.

With the Magic Wand Tool (W) select the black area, then go to Select>Similar to make sure all the black areas get selected. Then delete this area.

Import an image to use in our design. The one I’m using is courtesy from Thinkstock and you can find it here. Duplicate this layer because we will use it a few more times with different blur values.

Now: Filter>Blur>Gaussian Blur. Use 20 pixels for the Radius.

Next: Layer>Layer Styles>Color Overlay. Use a dark grey for the color and change the Opacity to 60%.

Now put the water drops in front of the image and let’s apply some layer styles to give them the realistic effect we want.

Go to Layer>Layer Styles>Blending Options and change the Fill Opacity to 0. After that select Inner Shadow. Use white for the color and LInear Dodge for the Blend Mode, for the Opacity use 50%, for the angle 90º, then for the Distance use 3 pixels and for the Size use 5 pixels. Also change the Contour mode to the Cone one.

Select Bevel and Emboss. Change the Depth to 350%, the Direction to Down, the Size to 7 pixels, the Soften to 5 pixels, then over the Shading options use 54º for the Angle and 42º for the Altitude. Also change the Gloss Contour to the Cove Deep one, the for the Highlight Mode use 80% with white and Color Dodge for the Blend Mode, then for the Shadow Mode use Multiply with black and 50% of Opacity.

Select Inner Glow then for the Blend Mode use Darken with 40% Oapcity and black for the color. Change the Source to Edge and the Size to 25 pixels.

Now select Color Overlay and use (#907f72) for the color with Color Dodge with 45% Opacity.

The last layer style option will be Drop Shadow. Use Multiply for the Blend Mode, black for the Color and 20% Opacity. Change the Angle to 90º and use 9 pixels for the Distance, 5% for the Spread and 10 pixels for the Size.

Make the photo without blur visible again and go to Filter>Blur>Gaussian Blur. Use 5 pixels this time. Then over the Layer Palette click with the right button of the mouse on the thumb of the water drops layer, then select "Select Pixel" to select just the water drops.
Select the photo that we applied the 5 pixles Gaussian Blur and go to Layer>Layer Mask>Reveal Selection. This way the image with 5 pixels blur will be only visible beneath the water drops

Select the layer mask that we created in the previous step and go to Filter>Blur>Motion Blur. Use -90º for the Angle and 80 pixels for the Distance.

After the motion blur, go to Image>Adjustments>Levels. Change the black and white inputs again to get rid of the blurry edges caused by the blur. You will have an effect like the image below as if the water drops were running down on the window.

Duplicate the layer with the photo that we applied the Gaussian Blur with 5 pixels for the radius only and delete the layer mask. The with the Horizontal Type Tool (T) add a text with a handwriting font, or if you have a tablet or is really good with the mouse you can write with your own handwriting. Again select just the pixels of the text like we did in the Step 15. Then mask this new photo with the shape of the text, so again the photo will be visible only beneath the text area.

Add a new layer and with the Brush Tool (B) and the same brush we created the water drops, add more water drops and especially over the text area like the image below. To apply the same layer style of the water drops, just click with the right button of the mouse over the water drops layer and select Copy Layer Style, then on the new layer with the small water drops click again with the right click of the mouse and select Paste Layer Style.

Duplicate the photo again and delete the layer mask, after that go to Layer>Layer Mask>Hide All. Select the thumb of the layer mask and go to Filter>Render>Clouds. Make sure you had black and white for the colors. This will apply a cloud texture to the foggy window effect, that will make it more realistic.

Select all layers and duplicate them, after that merge all the duplicated layers into one. You can also use the keyboard shortcut Command+Alt+Shift+E. Then go to Filter>Blur>Gaussian Blur. Use 20 pixels for the Radius.

Change the Blend Mode of this blurry layer to Overlay with 40% opacity.

Duplicate the previous layer and just change the Blend Mode to Screen, keep the same 40% of Opacity.

Add a new layer on top of the others and fill it with a radial gradient using dark grey and light grey for the colors. Also use Multiply for the Blend Mode.

And now:
